The craft subscription box Craftiosity is the perfect way to try out crafting techniques, includes everything you need for the project, and at the end you produce a lovely item that is perfect for decor, home use, and even as a gift! Projects have included French Knitting, clay moulding, concrete casting, paper making, and lots more. These projects work well for anyone who is creative or just wants to be, and the step-by-step and complete aspect means you can be confident you have everything you need right there in the box.

This month’s project is to make an Appliqué Lavender Pouch, perfect for hanging in a wardrobe or scenting a drawer.

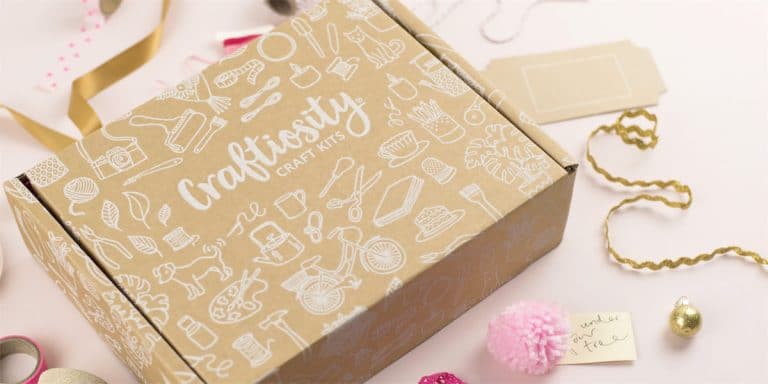
Inside the beautifully presented box you have different coloured felts, thread, needles, beads, and complete detailed instructions. The instructions are always excellent, and there is also a link to a step-by-step view on the Craftiosity website. While I don’t always use the videos, they can be especially useful for any tricky bits of technique and often it’s easier to actually see somebody doing it, so it’s a great option to have.

As I sad, the kits provide everything you need, though it’s generally expected you will have basic tools like scissors and pencils. This box, though, also contains these really lovely folding scissors. I had to take an extra picture of them because they are so pretty. They’re not all about looks though, they are very sharp and absolutely perfect for cutting felt, especially making small cuts when big scissors are just two awkward. These are a great example of items that you can keep and use again.
So, on to the project.

The project picture show a circular pouch with a cute lavender field scene in cut out pieces of felt. The first thing to do is cut out all the pieces, for which a template is provided. First you cut out the template shapes, draw round them onto the appropriate colour felt, then cut them out. Those little scissors were extremely useful, because while I have several pairs of scissors I don’t actually have any small sharp ones. The small scissors were much easier for cutting this kind of soft fabric.
Next the instructions showed how to stick the various pieces. First the darker green hillside pieces had small stitches representing grass. I actually did this project in collaboration with my daughter, she did all of the grass stitching there.
The pieces for the sun and clouds were then stitched to the blue background with a running stitch.
All of the sewing parts were actually very simple. The instructions (and video) show exactly how to do them, but unless you’ve never picked up a needle they are easy to get right.

There was a package of tiny beads to add rays to the sun piece. One of the needles included was very thin, to accommodate the size of the beads. I have to say I had great trouble threading this very thin needle, but fortunately my daughter came to my rescue. The needle really did have to be that thin too. Beads were sewn in a line to represent the sun’s rays, and also they give a lovely texture to the overall picture.
The lavender field at the bottom was made from little pieces of the purple felt. There was a template for these too, but I actually found them a bit too fiddly to cut out to the template, so I just kind of freehanded some shapes that looked sort of right! These were to be sewn on with a French knot. Now this is something I haven’t ever done before, and so the instruction video here was extremely useful. I also practiced on a bit of scrap felt beforehand to make sure I had it correct. It took a few goes so I’m glad I practiced.
At this point I was concentrating a lot, so I actually forgot to take pictures of this process! But after I arranged them to my liking, they were attached with a few of the French knots. It actually looks very effective, giving more nice texture.

After sewing the individual pieces on to create the picture (more simple running stitch), this is what the whole thing looked like. You can see the little knots in the lavender pieces there. There was also the stems of the lavender, which used a backstitch. This essentially means it looks like one continuous line of stitches without any gaps. It’s actually very easy, and I actually learned this technique on a previous Craftiosity project!As you can see, my rows are not perfectly straight, but I don’t mind, it adds to the handmade individual look, right?
This front circle was the sewn to another plain circle the same size, leaving a gap at the top.

This gap is, of course, so you can stuff the pouch. My daughter did some of this too, along with the final stitching. First there is some wadding, then a little bag of dried lavender, and then more wadding. I actually managed to squash all the wadding provided inside, so it’s quite fat, but it looks really nice.
There is also a piece of stripy string/yarn that you knot into a loop and sew inside the middle. Once it was all stuffed, we closed up the gap, adding the string loop, and the whole thing was done.

This is the finished pouch! I think it looks really pretty, and it smells wonderful. The lavender is sewn inside so it would might be a bit tricky to remove and change, but because it’s all made from soft fabric, you could easily refresh it by just sprinkling it with lavender essential oil to refresh it. I’ve now got it hanging in my wardrobe, and every time I open the door it smells absolutely amazing!